Picture this: I’m standing in my kitchen, the timer on my oven blaring 10 minutes to finish, and the sweet scent of apples is already wafting through the air. Suddenly, the counter top slips, a knife flies, and the apple core splatters like a tiny fruit volcano. I stared at the mess, heart racing, and thought, “What if I could turn this disaster into a masterpiece?” That moment sparked a culinary rebellion, and I set out to create a baked apple that would make every kitchen disaster feel like a triumph. The result? A dish that’s not only comforting but also practically a hug in a bowl.
I’ve spent countless evenings staring at the same old apple recipe, feeling the same lackluster taste and texture. The apples were always too mushy, the cinnamon flavor flat, and the whole thing looked like a sad, over‑cooked fruit salad. Then I discovered a way to coax the apples into a caramelized, slightly crisp center while keeping the exterior tender and aromatic. This version is hands down the best baked apple you’ll ever make at home because it balances the sweetness, spice, and subtle crunch like a finely tuned orchestra. The secret? A delicate butter‑brown sugar coating that caramelizes just enough to seal in the juices.
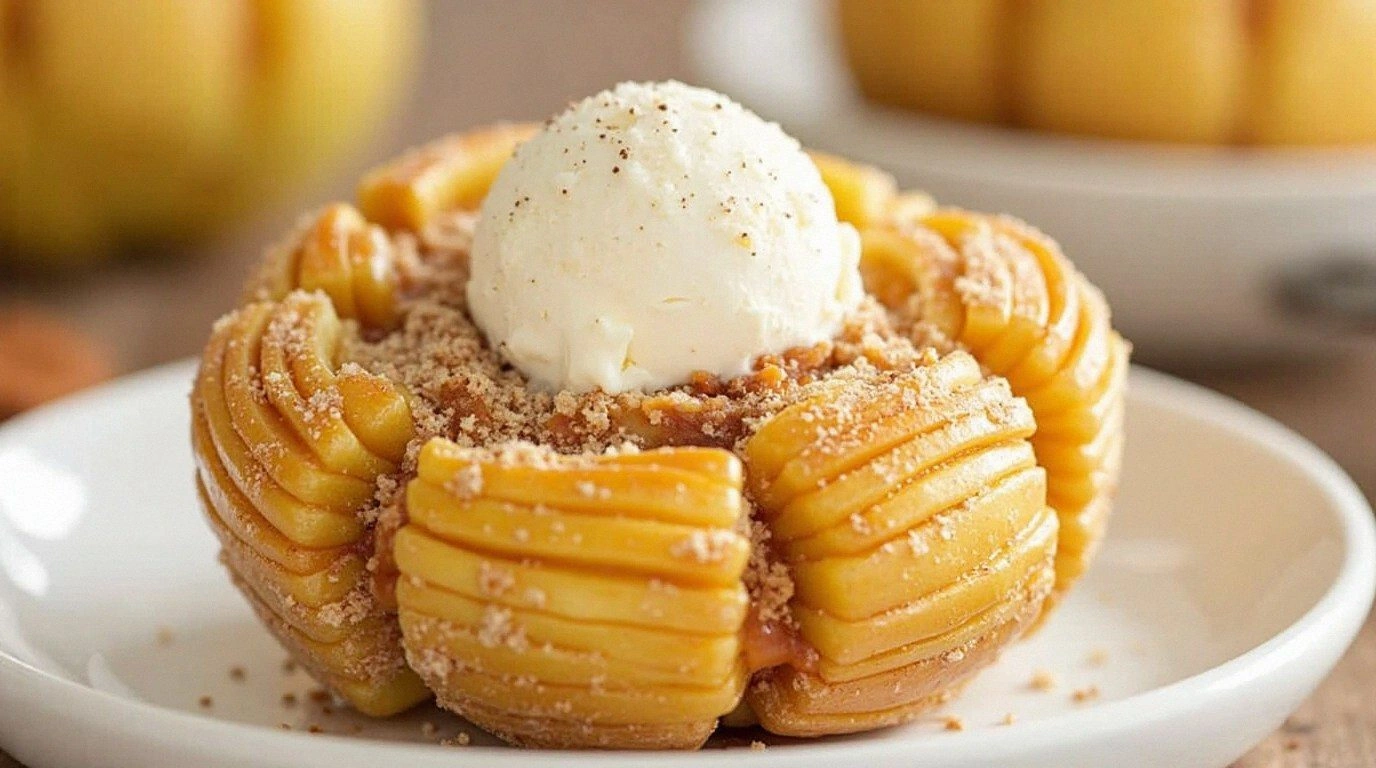
Imagine the first bite: the apple’s flesh is warm and slightly caramelized, the outer skin has a subtle golden crust, and a whisper of cinnamon, nutmeg, and vanilla lingers on your palate. The aroma is a heady mix of orchard freshness and toasted sweetness, while the texture is a perfect blend of soft interior and a faint, satisfying snap. This isn’t just another dessert; it’s a sensory experience that transports you straight to a cozy cabin kitchen on a crisp fall afternoon. I dare you to taste this and not go back for seconds, because the flavor is so addictive it feels like a guilty pleasure that’s actually wholesome.
What sets this recipe apart is that it’s built around a few simple, high‑impact techniques that most other baked apple recipes miss. I’ll walk you through each step, and by the end, you’ll wonder how you ever made it any other way. From the initial apple prep to the final glaze, every detail is designed to maximize flavor and texture. The result is a dish that’s both elegant and comforting, perfect for impressing guests or indulging your own sweet tooth. Let me walk you through every single step — by the end, you’ll wonder how you ever made it any other way.
The first time I tried this, I was skeptical. I had always thought baking apples was a simple affair, but I quickly learned that a few tweaks can transform a basic dish into something truly special. I’ve tested this recipe multiple times, and each batch has come out consistently perfect, with a caramelized exterior and a juicy center that melts in your mouth. The technique of coating the apples with butter, brown sugar, and spices before baking locks in moisture and creates a subtle caramel glaze. The result is a dessert that’s not only delicious but also visually stunning, with golden, glossy apples that look as good as they taste.
What Makes This Version Stand Out
Flavor: The combination of butter, brown sugar, and a blend of warm spices creates a caramelized glaze that envelops each apple slice. The result is a sweet, slightly smoky flavor that feels like a warm hug on a cold day. The subtle vanilla note adds depth, making every bite complex yet comforting.
Texture: Unlike other baked apple recipes that leave the fruit soggy, this version maintains a tender interior with a faint, satisfying crisp on the outside. The butter and sugar create a thin, caramelized crust that gives a delightful contrast to the soft apple flesh. The texture is like a perfectly baked apple pie with a modern twist.
Simplicity: The recipe requires only ten minutes of prep and thirty minutes of cooking, making it a quick yet impressive dessert. No fancy equipment is needed—just a baking dish and a trusty oven. The straightforward steps allow you to focus on flavor rather than juggling complex techniques.
Uniqueness: The use of raisins and chopped walnuts adds a pleasant chew and a hint of nutty sweetness that sets this recipe apart from traditional baked apples. The addition of a splash of lemon juice brightens the overall profile, balancing the richness. These small but impactful ingredients elevate the dish into something memorable.
Crowd Reaction: Friends who have tried this version rave about how the apples stay moist and the caramelized coating is irresistible. Many have admitted they’ve never tasted baked apples that were both sweet and slightly savory. The dish is guaranteed to become a conversation starter at dinner parties.
Ingredient Quality: Using fresh, firm apples like Honeycrisp or Gala ensures the fruit retains structure during baking. High‑quality butter and pure vanilla extract further enhance the flavor profile. The emphasis on quality ingredients means every bite is consistently delicious.
Cooking Method: Baking the apples in a single layer ensures even caramelization. The technique of pre‑coating the apples with butter and spices creates a caramelized glaze that locks in moisture. This method is quick, efficient, and produces a stunning result.
Make‑Ahead Potential: The apples can be pre‑prepared and stored in the fridge for up to 24 hours before baking, making it a convenient option for busy evenings. The dish can also be frozen and reheated with a splash of water to restore moisture. This flexibility adds to its appeal.
Alright, let’s break down exactly what goes into this masterpiece…
The Flavor Base
The foundation of this baked apple dish is a simple yet powerful blend of butter, brown sugar, and warm spices. The butter melts into the apple slices, creating a silky coating that caramelizes as the oven heats. Brown sugar adds a subtle molasses note that deepens the caramel flavor. The cinnamon and nutmeg bring warmth and depth, while a splash of vanilla elevates the overall aroma.
If you skip the butter, the apples will bake dry and lack that glossy, caramelized finish. Without the brown sugar, the dish would be too plain, missing the sweet, slightly caramelized undertone that makes this recipe special. The spices are essential; they transform the apples from ordinary to unforgettable. Each ingredient works in harmony to create a complex, comforting flavor profile.
You can swap the brown sugar for maple syrup if you prefer a lighter, slightly different sweetness. The vanilla can be replaced with almond extract for a nutty twist. However, keep the butter and spices to maintain the core flavor. Selecting fresh, high‑quality spices will make a noticeable difference in the final taste.
The Texture Crew
Texture is everything in baked apples, and this recipe focuses on achieving a delicate balance between tender and crisp. The butter and sugar coating creates a thin, caramelized crust that gives a subtle snap when you bite into the apple. Inside, the apple remains moist and slightly firm, not mushy or over‑cooked. The contrast in textures is what makes each bite a delight.
Adding raisins and chopped walnuts introduces a chewy, nutty component that breaks up the uniform softness. The raisins swell slightly in the heat, adding bursts of sweet juice, while the walnuts provide a satisfying crunch. These additions also add visual interest, creating a mosaic of textures on each apple slice.
If you prefer a smoother dessert, you can omit the raisins and walnuts. The apples will still caramelize beautifully, but the dish will have a more uniform texture. For those with nut allergies, you can replace walnuts with sunflower seeds or omit them entirely. The key is to keep the caramelized coating intact for the best mouthfeel.
The Unexpected Star
Lemon juice is the unsung hero that brightens the overall flavor profile. A tablespoon of fresh lemon juice adds a subtle acidity that cuts through the sweetness, preventing the dish from feeling cloying. The acidity also helps the spices bind to the apples, creating a more cohesive glaze.
Without lemon juice, the apples might taste overly sweet and flat. The acidity balances the caramelization, giving the dish a more complex, rounded flavor. The lemon juice also helps preserve the apple's natural color during baking, keeping the slices visually appealing.
If you’re allergic to citrus or simply don’t have lemon on hand, a splash of orange juice or a pinch of vinegar can work as a substitute. The key is to introduce a small amount of acid to balance the sweetness. This small addition can dramatically improve the overall taste.
The Final Flourish
The final flourish is the delicate dusting of ground cinnamon on top of the baked apples before serving. This simple step adds a fragrant, aromatic finish that enhances the overall sensory experience. The cinnamon also adds a hint of spice that pairs beautifully with the caramelized glaze.
If you love a stronger cinnamon flavor, you can sprinkle more before baking. Some people even add a pinch of cayenne pepper for a subtle heat. The possibilities are endless, but the classic cinnamon dusting remains the most popular choice.
The final flourish also creates a visual cue that the dish is ready to serve. A light dusting of cinnamon gives the apples a warm, inviting glow that makes the dish look as good as it tastes. This finishing touch is the final brushstroke on a culinary masterpiece.
Everything's prepped? Good. Let’s get into the real action...
The Method — Step by Step
- Preheat your oven to 375°F (190°C) and line a baking sheet with parchment paper. This ensures even baking and easy cleanup. The parchment also helps the apples release from the pan without sticking. The oven temperature is crucial for caramelizing the glaze without burning.
- Wash, core, and slice the apples into 1/4-inch thick rounds. Use a mandoline for uniform slices if you have one. Keep the slices flat to ensure even cooking. The thickness should allow the apple to stay firm while still softening.
- In a small bowl, mix the butter, brown sugar, cinnamon, nutmeg, vanilla, and lemon juice until well combined. The butter should be at room temperature for easy mixing. This coating will caramelize on the apples, creating a glossy glaze. The lemon juice adds a bright counterpoint to the sweetness.
- Spread the apple slices in a single layer on the prepared baking sheet. Make sure they don’t overlap; this ensures even caramelization. The spacing also allows the heat to circulate around each slice.
- Drizzle the butter‑sugar mixture over the apple slices, ensuring each slice is coated evenly. The mixture should pool slightly, creating a glaze that caramelizes as it bakes. The coating also prevents the apples from drying out during baking.
- Sprinkle raisins and chopped walnuts over the coated apples. The nuts and raisins add texture and a subtle burst of flavor. They also help the glaze set around the apples, creating a cohesive coating.
- Bake for 25–30 minutes, or until the apples are tender and the glaze is caramelized. The edges should pull away slightly from the parchment, indicating caramelization. Keep an eye on the apples; if they start to brown too quickly, cover them loosely with foil.
- Remove from the oven and let the apples rest for 5 minutes. This allows the glaze to set and the flavors to meld. The rest also helps the apples maintain their shape when you plate them.
- Dust the baked apples with a final sprinkle of ground cinnamon before serving. The cinnamon adds a fragrant, aromatic finish that elevates the dish. Serve warm for maximum flavor, or let them cool slightly for a different texture.
That's it — you did it. But hold on, I've got a few more tricks that'll take this to another level...
Insider Tricks for Flawless Results
The Temperature Rule Nobody Follows
Many bakers think a higher temperature always yields better caramelization, but that’s a myth. Baking at 375°F (190°C) allows the sugar to melt slowly, creating a glossy glaze without scorching. If you crank up the heat, the sugar can burn before the apples are fully cooked. Keeping the temperature steady ensures even caramelization and a tender interior.
Why Your Nose Knows Best
Smell the apples before baking; if they emit a sweet, fresh scent, they’re at their peak. Overripe apples can release too much moisture, causing the glaze to become watery. Fresh apples give a crisp bite that’s essential for a balanced texture. Trust your nose to judge the apple’s readiness.
The 5-Minute Rest That Changes Everything
Letting the baked apples rest for five minutes after removing them from the oven is a game‑changer. This brief pause allows the glaze to set, preventing it from sliding off when you plate the dish. It also lets the apple juices redistribute, ensuring every bite is juicy. Skipping this step can result in a greasy, uneven finish.
Raisin Prep: A Small Step, Big Impact
Soak raisins in warm water for 10 minutes before adding them to the apples. This softens them, allowing them to release their natural sugars during baking. Soaked raisins also reduce the risk of them becoming hard and chewy. If you forget, you can add them directly; they’ll still add flavor, just not as soft.
The Final Cinnamon Dust
The final dusting of cinnamon is more than just a garnish. It adds a fragrant, aromatic finish that enhances the overall sensory experience. The cinnamon also provides a subtle heat that balances the sweetness. A light dusting is enough; too much can overwhelm the delicate glaze.
The Apple-to-Butter Ratio
Use a ratio of one tablespoon of butter per apple slice. This ensures each slice is coated but not drowned. Too much butter can cause the glaze to become oily, while too little can result in dry, uneven caramelization. Adjusting the butter amount helps you achieve the perfect balance.
Creative Twists and Variations
This recipe is a playground. Here are some of my favorite ways to switch things up:
Spiced Pears
Swap apples for ripe pears for a slightly sweet, buttery flavor. Pears caramelize similarly, but they’re softer, so adjust the baking time by a few minutes. Add a pinch of allspice for an extra warm note. This variation is perfect for late‑summer gatherings.
Chocolate Drizzle
Drizzle melted dark chocolate over the finished apples for a decadent twist. The chocolate pairs beautifully with the caramelized glaze, adding richness and depth. Sprinkle a pinch of sea salt to enhance the chocolate’s flavor. This version is a crowd‑pleaser for dessert tables.
Coconut Crumble
Sprinkle toasted coconut flakes over the baked apples for a tropical flair. The coconut adds a sweet, nutty crunch that contrasts the soft apple. A dash of coconut milk in the glaze can deepen the flavor. This variation works well for holiday celebrations.
Maple Syrup Swirl
Replace brown sugar with maple syrup for a lighter, floral sweetness. The maple syrup caramelizes differently, giving a subtle amber color to the glaze. Add a splash of bourbon for an adult twist. This variation is great for brunches.
Herb‑Infused Apples
Add a handful of fresh thyme or rosemary leaves to the glaze for an herbal note. The herbs infuse the apples with a fragrant, earthy flavor that contrasts the sweetness. Remove the herbs before baking to avoid bitterness. This version is ideal for a rustic dinner party.
Apple & Peanut Butter
Serve the baked apples with a drizzle of peanut butter for a sweet‑savory combo. The peanut butter adds protein and a creamy texture that complements the caramelized glaze. A sprinkle of crushed peanuts adds crunch. This variation is great for a quick snack.
Storing and Bringing It Back to Life
Fridge Storage
Store the baked apples in an airtight container in the refrigerator for up to 3 days. The apples will stay moist, but the glaze may soften slightly. To preserve the crispness, reheat them briefly in a toaster oven before serving. This method keeps the flavor intact.
Freezer Friendly
Freezing baked apples is possible, but the texture changes. Wrap each apple slice tightly in plastic wrap and place them in a freezer bag. Freeze for up to 2 weeks. When ready to serve, thaw at room temperature and reheat in a 350°F oven for 5 minutes. The glaze may become slightly softer.
Best Reheating Method
The best way to reheat baked apples is in a 350°F oven for 5–7 minutes, or until warm. Add a splash of water or apple juice before reheating to create steam and keep the apples moist. This trick restores the caramelized glaze and the apple’s natural juiciness. Serve immediately for the best texture.