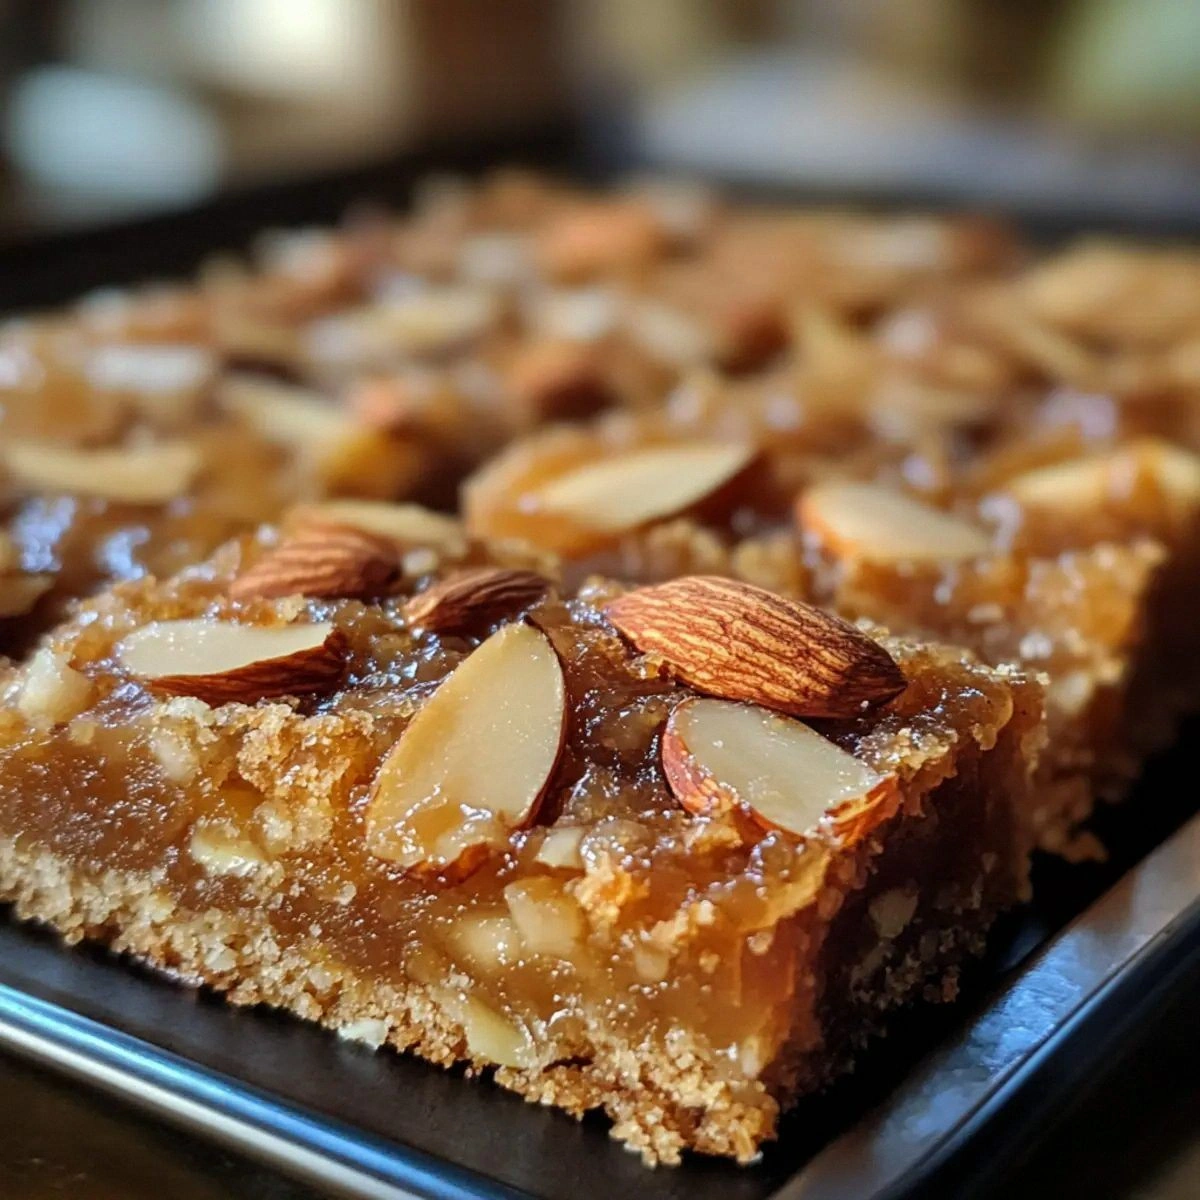
I was standing in my kitchen, staring at a pile of overripe pears that had been sitting on the counter for weeks, when a frantic call from my sister forced me to think fast. “I need something sweet, but not too sweet,” she pleaded, her voice echoing off the stainless steel. I grabbed the pears, a handful of almonds, and a dash of cinnamon, and the idea for what would become the Easy Baked Pear and Almond Bar was born. The aroma of caramelized fruit began to fill the air, and I could already taste the buttery crunch that would soon follow.
Picture this: the pears, sliced thin, their skins gleaming like polished jade, melt into a fragrant sauce that coats the almond crumbs. The heat of the oven turns the surface into a golden crust, crackling like the first snowflakes of winter. The air is thick with the scent of toasted sugar and cinnamon, while the sound of the timer ticking adds a rhythmic backdrop. As the bars cool, a dusting of powdered sugar settles like snow, creating a delicate, sweet finish that tingles the tongue. That sensory tableau is a promise of how this recipe will transform ordinary ingredients into something extraordinary.
What makes this version stand out? It’s not just the combination of pears and almonds; it’s the layered textures, the subtle acidity from lemon that brightens the sweetness, and the buttery layers that give it a bakery‑quality finish. The recipe balances the natural sweetness of pears with the earthy crunch of almonds and the smooth, comforting bite of buttered dough. The result is a bar that feels indulgent yet wholesome, a perfect bridge between dessert and snack. I dare you to taste this and not go back for seconds—because once you do, the temptation will be relentless.
I’ll be honest—after the first bite, I almost abandoned the rest of the batch to indulge in a second portion. But the real magic is in the method: the way the pears caramelize, the way the almond coating crisps, and the way the dough holds together without becoming soggy. Most recipes get this completely wrong, either by underbaking the pears or overbaking the crust. Here’s what actually works: a low‑heat, slow bake that allows the pears to soften without turning to mush, and a butter‑laden crust that crisps to a perfect golden brown. Picture yourself pulling these bars out of the oven, the whole kitchen smelling incredible, and the moment you taste the first bite feels like a warm hug from a childhood memory.
Okay, ready for the game‑changer? Let me walk you through every single step—by the end, you’ll wonder how you ever made it any other way. From selecting the right pears to mastering the butter‑crumb mixture, we’ll cover it all. This is hands down the best version you'll ever make at home, and I promise you’ll feel like a pastry chef when you finish.
What Makes This Version Stand Out
- Flavor Depth: The combination of sweet pears, sharp lemon, and warm cinnamon creates a flavor profile that feels both comforting and adventurous. Each bite delivers a burst of fruitiness followed by a lingering almond aftertaste.
- Texture Contrast: The chewy, caramelized pear center contrasts beautifully with the crisp, buttery almond coating. The dough’s crumb is tender yet sturdy enough to hold everything together.
- Ingredient Simplicity: With only ten ingredients, this recipe is a breeze for busy weeknights, yet the result feels like a gourmet treat.
- Make‑Ahead Friendly: Once baked, the bars keep wonderfully for up to a week in the fridge, and they freeze well for later indulgences.
- Versatility: Swap the almonds for walnuts or pistachios, or add dried cranberries for a tart twist—this base adapts effortlessly.
- Crowd‑Pleaser: Whether you’re hosting a brunch or a quick snack, these bars bring a polished look and a delicious taste that will have everyone asking for the recipe.
Alright, let's break down exactly what goes into this masterpiece…
Inside the Ingredient List
The Flavor Base
The pears are the star of this recipe, but they’re not just a fruit; they’re a liquid gold that melts into a syrupy glaze. Using ripe pears ensures a natural sweetness that balances the tartness of lemon juice. If you’re in a hurry, you can substitute pears with apples, but the texture will shift slightly—apples will stay firmer, giving the bars a chewier bite.
The Texture Crew
Almonds add a satisfying crunch that snaps like thin ice when you bite into them. They also bring a nutty aroma that enhances the overall flavor. If you’re allergic or simply don’t have almonds on hand, walnuts or pistachios will do wonders—just remember to adjust the amount slightly to avoid an overpowering taste.
The Unexpected Star
Butter is the unsung hero that ties everything together. The 2 tablespoons of unsalted butter melt into the pear mixture, creating a silky texture, while the 1/2 cup of cold butter creates the crumbly, flaky crust that crisps beautifully. The cold butter’s role is crucial; if it melts too early, the crust will become greasy and lose its structure.
The Final Flourish
The flour mixture—1 cup plus 1/4 cup of all-purpose flour—provides the base for the dough, giving it body and helping it hold the pear filling. The flour also absorbs excess moisture, preventing the bars from becoming soggy. If you prefer a gluten-free version, substitute the flour with an equal amount of almond flour or a gluten-free blend, but keep in mind the texture will change slightly.
Everything's prepped? Good. Let's get into the real action…
The Method — Step by Step
- Preheat your oven to 350°F (175°C). Line a 9×13-inch baking pan with parchment paper, leaving a little overhang on the sides for easy removal. This simple step ensures even baking and prevents sticking. If you’re feeling adventurous, add a light dusting of cocoa powder on the parchment for a chocolatey twist.
- While the oven warms, peel, core, and slice the pears into 1/4-inch thick wedges. The thinner the slices, the quicker they’ll caramelize, so aim for uniformity. Place the slices in a large skillet over medium heat and sprinkle with 1/4 cup granulated sugar and 1 tablespoon lemon juice. Stir gently to coat, then let the mixture simmer for about 5 minutes, or until the pears soften and the sugar dissolves into a glossy syrup. Watch this part closely—when the pears start to bubble, that’s your cue.
- Add 1 teaspoon ground cinnamon and 1/2 cup sliced almonds to the skillet. Stir until the almonds are evenly distributed and the mixture is fragrant. The almonds will toast slightly, releasing their oils and adding depth to the flavor. Remove from heat and let the pear mixture cool to room temperature; this prevents the butter from melting prematurely.
- In a separate bowl, combine 1 cup all-purpose flour, 1/4 cup all-purpose flour, and 1/4 cup brown sugar. Mix these dry ingredients thoroughly to ensure even distribution of the sugar, which will caramelize during baking. Add 1 teaspoon vanilla extract and whisk until the mixture forms a crumbly dough. This is the foundation of the crust.
- Cut 1/2 cup cold unsalted butter into small cubes. Add the butter to the flour mixture and use a pastry cutter or your fingertips to blend until the mixture resembles coarse crumbs. The cold butter keeps the dough flaky; if it’s too warm, the crust will become greasy. A quick tip: keep the butter chilled until you’re ready to combine.
- Press half of the crumbly dough into the bottom of the prepared pan, creating an even layer about 1/2 inch thick. This forms the base that will support the pear filling. Then, evenly spread the cooled pear mixture over the crust, ensuring each slice is fully covered.
- Top the pears with the remaining dough, pressing it gently onto the fruit to seal the edges. This step is critical—if you don’t seal the edges, the filling may leak out during baking, leading to a soggy center. The edges should pull away slightly when you lift the pan, indicating that the dough has sealed properly.
- Bake for 30 minutes, or until the crust turns a golden brown and the pears are bubbly. The aroma should be intoxicating—think of warm cinnamon and sweet fruit. After baking, remove the pan from the oven and let it cool on a rack for 10 minutes before cutting. This cooling period allows the filling to set, preventing a mushy texture.
That's it—you did it. But hold on, I've got a few more tricks that'll take this to another level. From dusting powdered sugar to slicing the bars into perfect portions, these final touches will elevate the presentation and flavor.
Insider Tricks for Flawless Results
The Temperature Rule Nobody Follows
Many bakers set their ovens too high, thinking a hotter bake will crisp the crust faster. In reality, a steady 350°F (175°C) gives the pears time to soften without evaporating the sugars that create the glaze. If your oven runs hot, consider using an oven thermometer to ensure accuracy.
Why Your Nose Knows Best
The first scent that hits you while baking is a reliable indicator of doneness. When the pears are fully caramelized, the aroma will be sweet, slightly nutty, and reminiscent of a warm bakery. Trust your nose, not the timer, especially if you’re baking for the first time.
The 5-Minute Rest That Changes Everything
Letting the bars rest for five minutes after baking allows the juices to redistribute, preventing a runny center. This simple pause also makes the bars easier to slice, as the crumb will firm up slightly. Skipping this step can lead to uneven bites and a soggy texture.
Dusting for the Final Touch
A light dusting of powdered sugar not only adds a sweet finish but also creates a subtle contrast against the golden crust. Use a fine sieve to ensure even coverage, and consider adding a pinch of sea salt on top for a savory pop.
Storing for Longevity
These bars keep wonderfully in an airtight container at room temperature for up to three days. For longer storage, wrap each bar individually in parchment and place them in a freezer bag. They’ll stay fresh for up to two months, and thawing at room temperature restores their delightful texture.
Creative Twists and Variations
This recipe is a playground. Here are some of my favorite ways to switch things up:
Maple Almond Surprise
Swap the brown sugar with maple syrup for a richer, deeper sweetness. Add a dash of nutmeg to complement the maple flavor. This version is perfect for a cozy fall brunch.
Chocolate Chip Pear Bar
Fold in 1/2 cup chocolate chips into the pear mixture before layering. The chocolate will melt slightly, creating pockets of gooey delight that contrast with the crunchy crust.
Citrus Zest Twist
Add 1 tablespoon of orange zest to the pear mixture for a bright, citrusy note. The zest pairs beautifully with the almond flavor and gives the bars a refreshing lift.
Nutty Caramel Delight
Replace the sliced almonds with chopped pecans and drizzle a thin layer of caramel sauce over the top before baking. The caramel will create a glossy, sweet coating that caramelizes beautifully.
Spiced Apple Variation
Use apples instead of pears and add a pinch of clove to the flour mixture. The apple’s natural tartness balances the sweetness, while the clove adds a warm, aromatic undertone.
Storing and Bringing It Back to Life
Fridge Storage
Place the bars in an airtight container or wrap them tightly in plastic wrap. They will stay fresh for up to three days at room temperature or up to a week in the refrigerator. If you notice the crust drying out, add a small paper towel to absorb excess moisture.
Freezer Friendly
Wrap each bar individually in parchment paper, then place them in a freezer bag. Label with the date and freeze for up to two months. Thaw overnight in the refrigerator before serving.
Best Reheating Method
To revive a frozen bar, preheat the oven to 350°F (175°C) and bake for 10-12 minutes, or until warmed through. For a quick snack, microwave on medium power for 20-30 seconds. Add a tiny splash of water before reheating to create steam, which restores the bars to their original moist, buttery state.