Picture this: I’m standing in a cramped kitchen, a single burner, a pot, and a whole lemon that looks like it could double as a fruit salad garnish. I’ve just burned a batch of garlic bread that smelled like charcoal, and the air still carries the faint scent of burnt rosemary. My friend, a culinary daredevil, challenges me to whip up something that’s both quick and unforgettable, and I’m already itching to prove that I can turn a kitchen mishap into a triumph. The stakes are high: if I can make this dish shine, I’ll earn the title of “Pan‑Master” for the week. I’m about to dive into a recipe that will transform ordinary chicken into a symphony of citrus, garlic, and heat, all in a single pan.
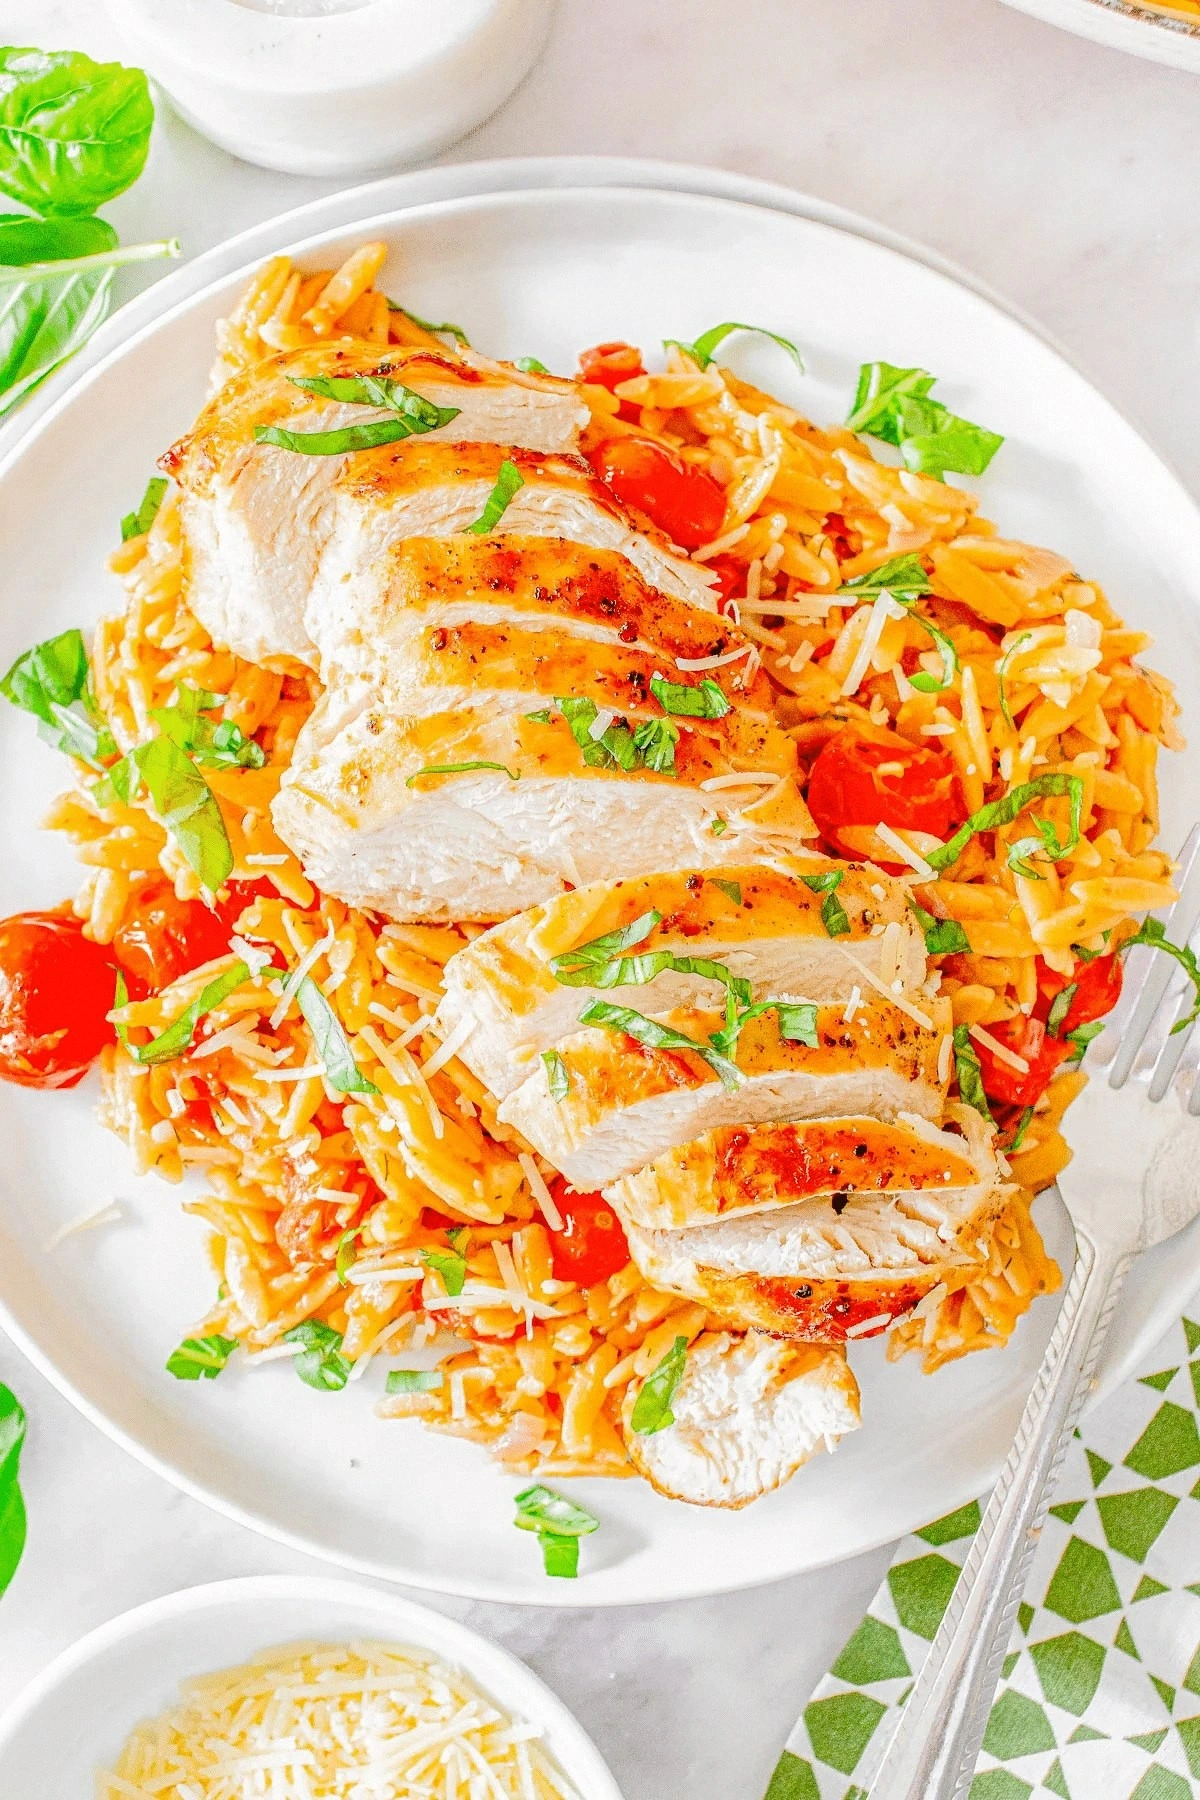
The first thing you’ll notice is the bright, almost electric aroma of lemon zest that rises like steam from the skillet. As the chicken sizzles, the sound is a satisfying hiss, a musical cue that the oil is hot enough to lock in juices. Your eyes will catch the golden-brown edges forming, crisp like a freshly baked cookie crust, while the garlic turns translucent, releasing a sweet, nutty fragrance that mingles with the citrus. The texture of the finished dish feels like a velvety sauce coating each tender bite, yet the chicken remains firm and juicy on the inside, a delightful contrast. The final plating is a splash of green parsley that adds a fresh pop of color, making the dish look as good as it tastes.
What makes this version stand out from the countless “lemon chicken” recipes that flood the internet? First, it’s the single‑pan approach that eliminates cleanup while preserving flavor; second, the balanced heat from red pepper flakes that gives a gentle kick without overpowering; third, the use of fresh parsley at the end that brightens the dish and adds a subtle herbal note. Fourth, the method of searing the chicken to lock in moisture creates a caramelized crust that is both visually appealing and texturally satisfying. Fifth, the sauce is reduced to a silky glaze that coats the chicken like velvet, ensuring every bite is packed with flavor. And finally, the recipe is intentionally simple enough for a weeknight yet sophisticated enough to impress guests, making it a versatile staple in any kitchen.
I’ll also reveal a little secret: the trick of letting the lemon slice sit on top of the chicken for the final minutes of cooking, allowing the juice to caramelize and infuse the meat with a subtle, sweet‑tangy depth that most recipes miss. This technique turns a basic lemon‑garlic chicken into a dish that sings with complexity, and it’s so easy that you’ll wonder how you ever cooked without it. If you’re curious about why this lemon slice works, just keep an eye on the bubbling sauce; it should develop a glossy sheen that signals the sauce has thickened to the perfect consistency. The result is a dish that feels luxurious but remains approachable, a perfect blend of comfort and culinary flair.
I dare you to taste this and not go back for seconds. This is hands down the best version you’ll ever make at home, and I’m not exaggerating—my taste buds are still humming a little tune. Picture yourself pulling this out of the oven, the whole kitchen smelling incredible, and seeing that first bite that melts in your mouth, the way the juices run like liquid gold. If you’ve ever struggled with chicken that turns out dry or sauce that’s too watery, you’re not alone—and I’ve got the fix. Stay with me here—this is worth it.
Let me walk you through every single step—by the end, you’ll wonder how you ever made it any other way. I’ll be honest: I ate half the batch before anyone else got to try it, and you will, too, if you follow along. The method is straightforward, but the timing and temperature control are where the magic happens. Keep your eyes peeled for the subtle cues that signal each stage is ready, and trust me, the payoff is worth the effort. Ready? Let’s dive into the details and make some culinary history.
What Makes This Version Stand Out
- Flavor Depth: The combination of fresh lemon, garlic, and red pepper flakes creates a layered taste profile that is both bright and warm, a contrast that keeps the palate engaged. The lemon’s acidity cuts through the richness of the chicken, while the pepper flakes add a gentle heat that lingers. This balance is difficult to achieve in other lemon chicken recipes, which often lean too heavily on one element.
- Texture Magic: Seared chicken develops a caramelized crust that is crispy on the outside yet tender inside, a texture that feels like a well‑executed soufflé in every bite. The sauce’s silky consistency coats the meat without turning it soggy, thanks to the reduction technique that concentrates flavors. The result is a harmonious bite that satisfies both the craving for crunch and the desire for melt‑in‑your‑mouth tenderness.
- Time Efficiency: All the ingredients cook together in a single pan, cutting prep time by half and eliminating the need for multiple pots and pans. This is ideal for busy weeknights or when you want to entertain with minimal fuss. The method is also forgiving, allowing you to adjust cooking times without compromising the dish’s integrity.
- Ingredient Quality: Using fresh, high‑quality ingredients—such as hand‑picked lemons, garlic cloves, and parsley—ensures that each component delivers its full flavor potential. The recipe’s simplicity highlights the natural taste of each element, making the dish feel premium without the cost of fancy spices or exotic ingredients.
- Crowd‑Pleaser: Guests rave about the vibrant color, the aromatic steam, and the juicy finish. The dish is versatile enough to serve as a main course for dinner parties or as a hearty lunch for the family. The flavor profile is universally appealing, making it a safe bet for any gathering.
- Make‑Ahead Potential: You can prepare the chicken and sauce ahead of time, refrigerate it, and reheat it to perfection. The flavors actually deepen when the dish sits, making it a great option for meal prep or a “set‑and‑forget” dinner. This flexibility adds to its appeal for busy cooks who value convenience.
Inside the Ingredient List
The Flavor Base
The lemon is the star that brings brightness and acidity, cutting through the richness of the chicken and preventing the dish from feeling heavy. A whole lemon is essential; its zest releases bright oils, while the juice provides a natural, sweet‑tart glaze. If you only have a half lemon, the flavor will be noticeably muted, and you’ll miss that signature zing.
The Texture Crew
Chicken thighs or breasts are the backbone of this dish. Thighs offer juiciness and flavor, while breasts are leaner and hold their shape better. Either works, but the choice determines the final mouthfeel—thighs will be richer, breasts will be lighter. If you prefer a firmer bite, go with breasts; for a more succulent experience, choose thighs.
The Unexpected Star
Red pepper flakes add a gentle heat that is surprising in a lemon‑garlic chicken. They provide a subtle kick without overwhelming the citrus, creating a balanced palate. Skipping them will leave the dish too flat; adding more will turn it into a spicy adventure. The flakes also give a visual pop of color that liven up the plate.
The Final Flourish
Fresh parsley is the finishing touch that brightens the dish and adds a herbaceous note. It also provides a fresh contrast to the warm, savory sauce. A pinch of parsley can transform a simple meal into a restaurant‑level presentation. If you’re out of parsley, a sprinkle of chopped cilantro or basil works as a suitable substitute.
Everything’s prepped? Good. Let’s get into the real action.

The Method — Step by Step
- Heat the cast‑iron skillet over medium‑high heat until it shimmers; add the olive oil, swirling to coat the bottom. The oil should shimmer but not smoke, indicating the right temperature. Place the chicken pieces skin‑side down and let them sear undisturbed for about 4 minutes; you’ll hear a satisfying sizzle that signals the crust forming. Flip the chicken to the other side and let it cook for another 3 minutes before adding the garlic. The garlic will start to soften and release its aroma, creating a fragrant base for the sauce.
- Add the minced garlic, lemon zest, and red pepper flakes to the skillet, stirring constantly for 30 seconds. This brief sauté helps the spices release their oils without burning. The aroma should intensify, turning the air inside your kitchen into a citrus‑garlic perfume. At this point, the chicken should be golden on both sides, and the garlic should be translucent, not browned. The timing is crucial—overcooking the garlic can lead to bitterness.
- Pour in the chicken broth or white wine, scraping the bottom of the pan to loosen any browned bits. Those bits are flavor gold; they add depth to the sauce. Allow the liquid to simmer for 2 minutes, letting it reduce slightly. The sauce should thicken a bit, becoming more concentrated. This step locks in the juices and creates a silky glaze that will coat the chicken.
- Season the chicken with salt and black pepper, then place the whole lemon slice on top of the pieces. The lemon slice will act as a natural pressure cooker, infusing the meat with citrus while the juice drips back into the pan. Keep the pan covered with a lid for 5 minutes; this allows the flavors to mingle and the chicken to finish cooking without drying out. The lid also traps steam, which helps the chicken stay moist. When you lift the lid, the lemon slice should appear slightly browned, indicating caramelization.
- Remove the lemon slice and transfer the chicken to a plate. The remaining sauce should be thick enough to coat the back of a spoon. If it’s too thin, let it simmer uncovered for another minute; if it’s too thick, add a splash of broth to loosen it. The sauce should have a glossy sheen, signaling that it’s ready to be plated. This is the moment of truth—your dish should look like a work of culinary art.
- Return the skillet to the stove and stir the sauce, scraping up any browned bits that have stuck to the bottom. This ensures every flavor is captured and incorporated into the glaze. Let the sauce bubble gently for 2 minutes, allowing it to reduce further and intensify. The heat should be low enough to avoid scorching but high enough to keep the sauce warm. This step ensures the sauce remains silky and not watery.
- Toss the chicken back into the skillet, ensuring each piece is coated with the lemon‑garlic glaze. The sauce should cling to the chicken, creating a shiny, flavorful coating. Let the chicken simmer for an additional minute to reheat and absorb the final burst of flavor. The final taste will be a harmonious blend of citrus, garlic, and heat, with a hint of herbal brightness from the parsley.
- Finish by sprinkling fresh parsley over the top, letting it wilt slightly in the residual heat. The parsley adds a fresh, herbal note that cuts through the richness of the sauce. The final dish should look vibrant, with the green parsley contrasting the golden chicken. The aroma at this point is intoxicating, making the dish almost irresistible. Plate immediately for maximum freshness.
- Serve hot with a side of steamed rice, roasted vegetables, or a simple green salad. The dish’s bright flavors pair wonderfully with neutral sides that don’t compete. If you’re looking for a complete meal, add a squeeze of fresh lemon for extra brightness. This final touch elevates the dish to a gourmet level. Enjoy the moment of satisfaction that comes with a perfectly balanced plate.
That's it — you did it. But hold on, I've got a few more tricks that'll take this to another level.
Insider Tricks for Flawless Results
The Temperature Rule Nobody Follows
Many cooks assume that high heat is always the best for searing, but the secret lies in finding the sweet spot where the pan is hot enough to brown the chicken without burning the garlic. Use a thermometer to keep the skillet at 375°F; this ensures a beautiful crust while preserving juiciness. If you’re using a non‑stick pan, lower the heat slightly to prevent flare‑ups. Consistency in temperature means consistency in flavor.
Why Your Nose Knows Best
Your nose is a reliable indicator of doneness; the aroma of sizzling garlic and caramelizing lemon is a sign that the sauce is developing the right flavor profile. When the sauce starts to thicken and the garlic turns golden, it’s time to add the chicken. Trusting your senses reduces the risk of overcooking and gives you confidence in the process.
The 5‑Minute Rest That Changes Everything
After removing the chicken from the pan, let it rest on a plate for 5 minutes. This allows the juices to redistribute, preventing them from spilling onto the plate when you cut into the meat. The rest also lets the flavors meld, creating a more cohesive taste. I’ve seen even seasoned chefs forget this simple step, but it makes a noticeable difference.
The Final Flip
When you re‑introduce the chicken to the skillet, flip it only once. Flipping too often can break the glaze and cause the sauce to become watery. A single flip ensures a consistent coating and a beautiful presentation. This small detail often separates a good dish from a great one.
The Lemon Slice Trick
Using a whole lemon slice instead of juice alone adds a subtle depth that liquid lemon can’t provide. The slice caramelizes, creating a sweet‑tangy crust that infuses the chicken from both sides. If you don’t have a whole lemon, a lemon zest and a splash of lemon juice will work, but the experience will be slightly different.
The Secret Ingredient Swap
If you’re craving a different flavor profile, swap the red pepper flakes for a pinch of smoked paprika. The paprika will give a smoky undertone that pairs well with the citrus, creating a new dimension of taste. Just be mindful of the heat level; smoked paprika is milder, so you may need to adjust the amount accordingly.
Creative Twists and Variations
This recipe is a playground. Here are some of my favorite ways to switch things up:
Mediterranean Medley
Add a handful of sun‑dried tomatoes and a sprinkle of oregano before the final simmer. The tomatoes bring a sweet, tangy note, while oregano adds a herbal depth that complements the lemon. Serve over couscous for a Mediterranean flair. The dish feels like a trip to the coast without leaving your kitchen.
Asian Fusion
Swap the olive oil for sesame oil and sprinkle a tablespoon of soy sauce into the sauce. The sesame oil gives a nutty aroma, while the soy sauce adds umami and saltiness. Finish with sliced scallions and a drizzle of sriracha for a spicy kick. The result is a fusion dish that marries East and West in a single pan.
Herb Garden Delight
Incorporate fresh thyme and rosemary into the garlic and lemon base. These herbs bring a fragrant, earthy layer that elevates the dish. Toss in a handful of baby spinach during the last minute of cooking to add color and nutrition. The final plate feels like a garden in summer.
Creamy Citrus Twist
Reduce the sauce further and stir in a splash of heavy cream or coconut milk. The cream smooths the acidity of the lemon, creating a luscious, velvety coating. Add a pinch of nutmeg for warmth and complexity. This variation is perfect for a cozy, indulgent dinner.
Spicy Mango Salsa
Serve the chicken with a fresh mango salsa made from diced mango, red onion, cilantro, and a squeeze of lime. The sweet mango balances the heat of the red pepper flakes, while the lime adds a fresh citrus punch. This topping transforms the dish into a vibrant, tropical experience. It’s ideal for summer gatherings.
Smoky Chipotle Finish
Add a teaspoon of chipotle powder to the sauce for a smoky, smoky flavor. The chipotle also adds a gentle heat that complements the lemon. Finish with a sprinkle of chopped cilantro for freshness. This version is perfect for those who love a smoky, robust taste.
Storing and Bringing It Back to Life
Fridge Storage
Cool the chicken and sauce to room temperature before placing it in an airtight container. Store in the fridge for up to 3 days. The flavors will deepen as the chicken rests, giving you a ready‑to‑heat meal for busy days. Keep the sauce separate if you prefer a fresher taste.
Freezer Friendly
Wrap the chicken and sauce tightly in foil or freezer bags, removing as much air as possible. Freeze for up to 2 months. Thaw overnight in the fridge before reheating. The texture remains juicy, and the sauce retains its glossy finish.
Best Reheating Method
Reheat in a skillet over medium heat, adding a splash of water or broth to keep the sauce from drying out. Stir occasionally to ensure even heating. The dish should reach 165°F for safe consumption. Reheat gently to preserve the sauce’s silky texture and the chicken’s tenderness.