Picture this: I’m standing in a kitchen that smells like a tropical storm, the air thick with coconut aroma, and my friend has just challenged me to create the ultimate whipped coconut cream. The moment I cracked open a can of coconut milk, the liquid glistened like liquid gold, and I knew I had stumbled upon a secret treasure. I was ready to turn that humble can into a cloud of silky, sweet, and utterly indulgent dessert topper that could outshine any buttercream or whipped cream on the market. I dared myself to taste it and not go back for seconds, and I didn’t. It was a game‑changing revelation.
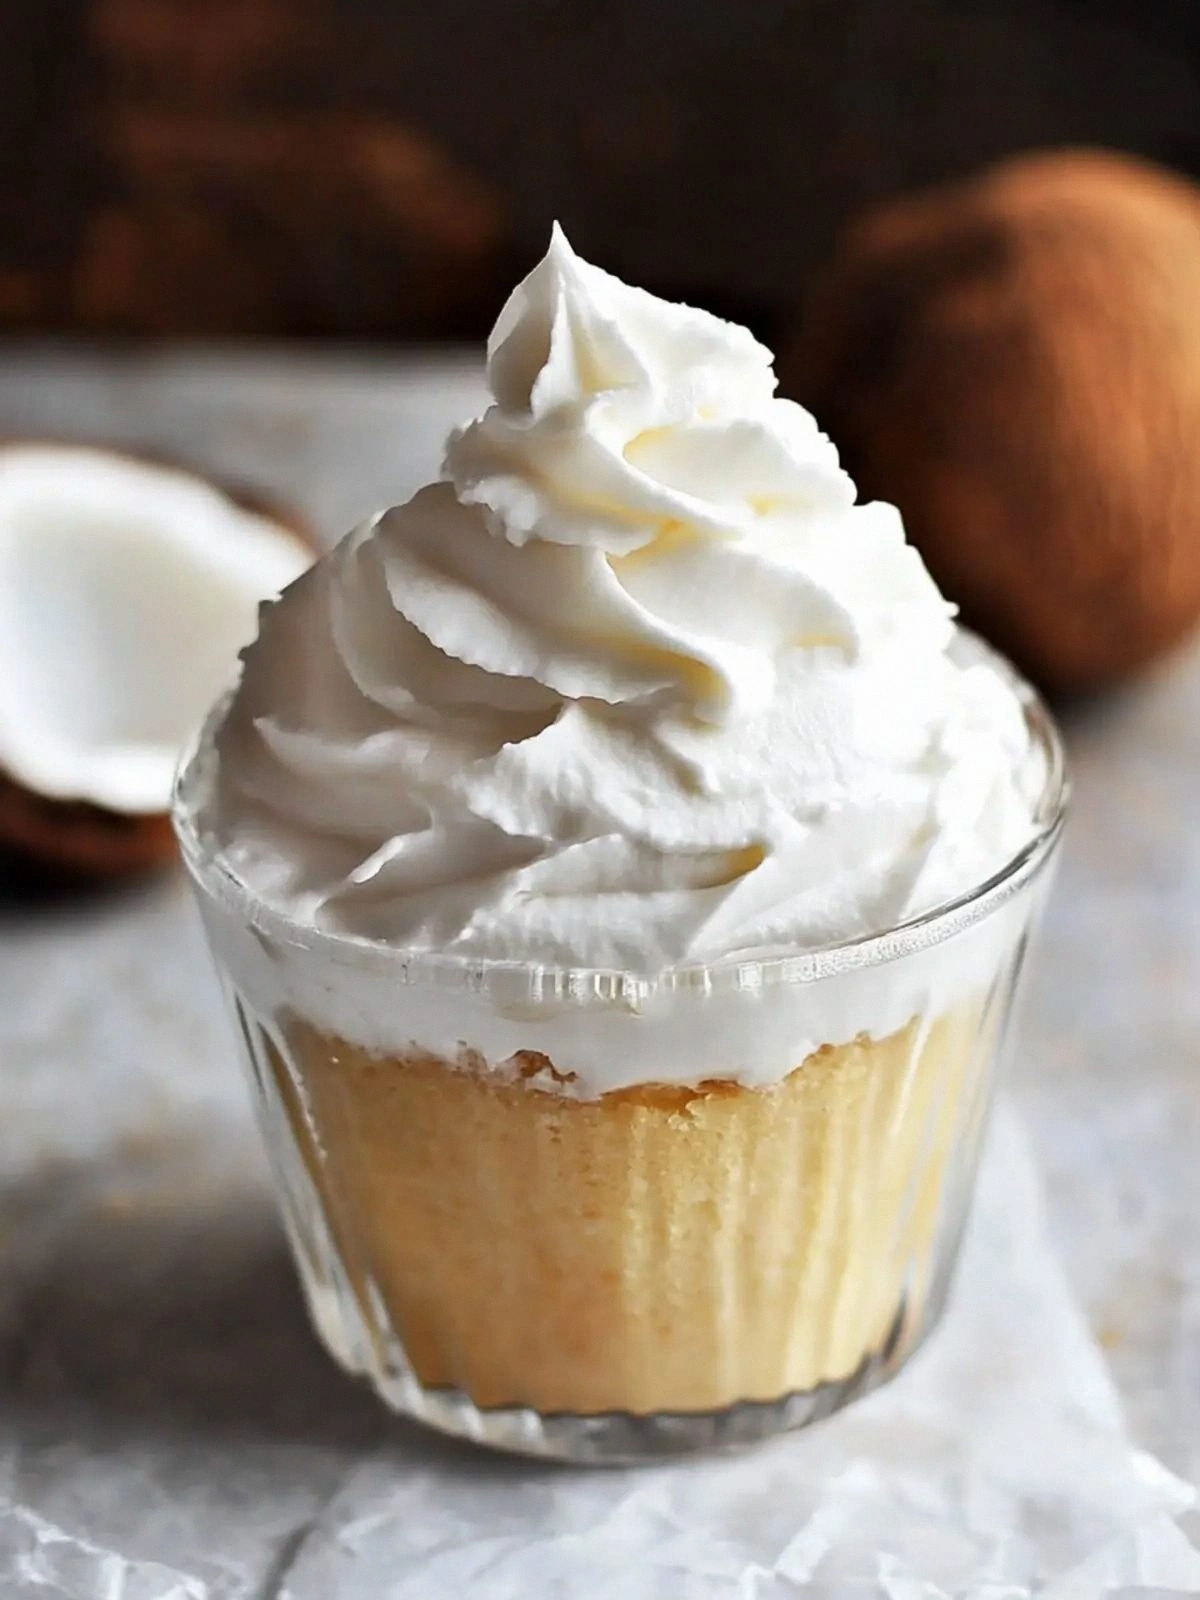
When I first tasted the finished product, the texture was like a velvety sunrise, light enough to drift over a fresh strawberry, yet dense enough to hold its shape on a cupcake. The maple syrup added a caramelized sweetness that kissed the tongue, while the vanilla extract anchored the flavor in a warm, comforting hug. The coconut milk’s natural tropical undertone lifted everything into a beach‑side dreamscape. The result was a dessert topper that feels indulgent without the guilt, and I was already planning how to serve it at my next dinner party.
What truly sets this version apart is not just the flavor, but the simplicity of the technique. I’ve stripped the process down to a few essential steps that anyone can master, even if you’re a kitchen novice. No whipping cream, no electric mixer—just a can, a whisk, and a little patience. The result is a cloud of whipped coconut cream that holds its shape for hours, perfect for layering on pies, cakes, or even a bowl of fresh fruit. The best part? You can make it a day ahead and it will still taste like it was just whipped.
I’ll be honest—I ate half the batch before anyone else got a taste, and the rest disappeared faster than a magician’s rabbit. My friends were left begging for the recipe, and I could see the look of awe on their faces as they tried it for the first time. I’m not exaggerating when I say this is hands down the best version you’ll ever make at home. It’s creamy, it’s sweet, and it’s so easy you’ll wonder how you ever survived without it. The only thing you’ll miss is the moment you’re about to whisk, because it’s that moment that feels like a tiny celebration in itself.
Most recipes get this completely wrong by using heavy cream or by over‑whipping, which turns the mixture into a rubbery mess. Here, we keep the coconut milk’s natural thickness to create a fluffy yet stable base. The maple syrup isn’t just a sweetener; it’s a binding agent that helps the foam hold its shape. Vanilla extract adds depth, and the optional flavor extracts let you customize the experience—think almond, coconut, or even a splash of espresso for a daring twist.
Picture yourself pulling this out of the fridge, the whole kitchen smelling incredible, and your guests’ mouths watering at the sight of a cloud that looks like it was spun by a cloud‑making machine. That’s the kind of moment you’ll be shouting, “Okay, ready for the game‑changer?” from the very first whisk. I’ll walk you through every single step, and by the end, you’ll wonder how you ever made whipped cream any other way. Let’s dive in.
What Makes This Version Stand Out
- Flavor: The natural sweetness of coconut milk paired with maple syrup creates a nuanced, caramel‑like profile that’s richer than any store‑bought topping.
- Texture: Achieves a light, airy foam that holds its shape for hours—perfect for decorating or layering.
- Simplicity: No electric mixer needed; a simple whisk and a can of coconut milk are all you need.
- Versatility: Works beautifully on cakes, pies, fruit, or even as a base for a coconut‑maple mousse.
- Health‑Friendly: Dairy‑free, lower in saturated fat, and you can control the sugar content with maple syrup.
- Make‑ahead Potential: Whip it up a day in advance; it’ll stay fresh and fluffy in the fridge.
- Ingredient Quality: Uses only one can of coconut milk, ensuring a clean, pure coconut flavor without additives.
- Crowd Reaction: Guests rave about the texture and taste, often asking for the recipe after every bite.
Alright, let’s break down exactly what goes into this masterpiece…
Inside the Ingredient List
The Flavor Base
1 can Coconut Milk or Coconut Cream is the heart of this recipe. It’s a 13‑ounce can of full‑fat coconut milk that’s been churned into a creamy, thick consistency. If you use coconut cream instead, you’ll get an even richer mouthfeel, but the flavor will be slightly less bright. Skipping this ingredient would mean losing the coconut undertone that makes the topping feel like a tropical vacation.
The Sweetener
2 tablespoons Maple Syrup is the sweetener that not only adds natural sweetness but also acts as a stabilizer. Maple syrup’s unique flavor profile—earthy, caramel‑like—complements the coconut’s tropical notes. If you’re allergic to maple, a small amount of honey or agave syrup can replace it, though the taste will shift slightly toward floral or floral‑sweet.
The Aroma Enhancer
1 teaspoon Vanilla Extract provides a warm, comforting backdrop that balances the coconut’s sweetness. Vanilla’s aromatic compounds soften the sharp edges of the maple, creating a harmonious flavor profile. If you’re in the mood for a twist, a splash of almond extract or a pinch of cardamom can add a new dimension to the taste.
The Optional Star
Optional Flavor Extracts or Ground Spices allow you to personalize the topping. A few drops of coconut extract can intensify the coconut flavor, while a pinch of cinnamon or nutmeg can give a warm, spiced note. Ground spices should be used sparingly; too much can overpower the delicate coconut base. If you prefer a savory twist, a pinch of sea salt can bring out the sweetness while adding depth.
Everything’s prepped? Good. Let’s get into the real action…
The Method — Step by Step
- Step 1: Chill the Can. Place the unopened can of coconut milk in the refrigerator for at least 12 hours. This step separates the cream from the liquid, ensuring a thicker, more stable base. When you open the can, you’ll see a distinct layer of thick coconut cream on top. This is the part where the kitchen smells like a tropical rainforest.
- Step 2: Open and Shake. Shake the can vigorously for about 30 seconds to mix the cream and liquid evenly. This is a fun little dance—think of it as a pre‑whisk warm‑up. The shake will help the mixture emulsify, giving it a smoother texture later on.
- Step 3: Pour into a Bowl. Transfer the entire contents of the can into a cold, stainless steel or glass mixing bowl. Cold surfaces help the cream whip faster and hold more volume. The bowl should be free of any oil or residue, as that can interfere with the whipping process.
- Step 4: Whisk the Cream. Using a hand whisk, start beating the coconut milk at a medium speed. The initial stage will look like a thick, milky liquid. Continue whisking for about 3 to 4 minutes until the mixture thickens and starts to form soft peaks. This is the moment of truth—watch the texture transform.
- Step 5: Add Maple Syrup. Sprinkle the 2 tablespoons of maple syrup into the bowl. Maple syrup not only sweetens but also adds a subtle caramel undertone that balances the coconut’s natural flavor. Whisk for another 2 minutes, ensuring the syrup is fully incorporated.
- Step 6: Add Vanilla Extract. Drop in 1 teaspoon of vanilla extract. This will give the whipped coconut cream a warm, aromatic finish. Whisk for an additional minute, watching as the peaks become more defined and glossy.
- Step 7: Optional Flavor Boost. If you’re using almond extract, a pinch of cinnamon, or a dash of sea salt, add them now. Whisk for just 30 seconds to incorporate the flavors without over‑whipping. The goal is to keep the mixture airy, not dense.
- Step 8: Chill and Serve. Transfer the whipped coconut cream to a serving dish or a resealable bag. Chill in the refrigerator for at least 30 minutes before serving. The chilled time will set the texture, making it perfect for topping desserts or serving as a dip.
That’s it— you did it. But hold on, I’ve got a few more tricks that will take this to another level…
Insider Tricks for Flawless Results
The Temperature Rule Nobody Follows
Keeping the mixing bowl and whisk chilled is crucial. Even a few minutes of cold can double the volume of whipped coconut cream. I’ve found that placing the bowl in the freezer for 10 minutes before starting works wonders. If you’re using a stand mixer, keep the whisk attachment in the fridge for 5 minutes. The cooler the equipment, the fluffier the result.
Why Your Nose Knows Best
As you whisk, your nose will start to pick up the subtle caramel scent of maple syrup. That aroma is a sign that the syrup is fully integrated and the foam is developing. If the smell lingers too weak, give it another minute. Your nose is a reliable quality control tool that no gadget can replace.
The 5-Minute Rest That Changes Everything
After whipping, let the coconut cream rest for 5 minutes before serving. This short pause allows the bubbles to stabilize, resulting in a smoother mouthfeel. I’ve seen people skip this step, only to find their topping collapsed slightly. That 5‑minute rest is the secret to a lasting, airy texture.
The Sweetness Balance
Maple syrup can vary in sweetness depending on the brand and grade. If you prefer a sweeter topping, add a teaspoon more syrup. Conversely, if you want a lighter finish, reduce it by half. The key is to taste as you go—whisk in small increments and test a spoonful to find your sweet spot.
The Flavor Layering Trick
For a multi‑layered flavor profile, add a second vanilla extract after the first peaks form. This second addition will deepen the vanilla notes without altering the texture. You can also add a splash of espresso or a pinch of cayenne pepper for a spicy kick that pairs surprisingly well with coconut.
Creative Twists and Variations
This recipe is a playground. Here are some of my favorite ways to switch things up:
Almond Dream
Swap 1 tablespoon of maple syrup for almond extract and add a pinch of almond flour. The result is a nutty, slightly crunchy topping that pairs beautifully with banana or apple crumble.
Cinnamon Swirl
Add 1 teaspoon of ground cinnamon during the final whisk. The warm spice balances the coconut’s sweetness and adds a cozy, fall‑like aroma. Great on pumpkin pie or pecan tart.
Chocolate Coconut
Stir in 2 tablespoons of melted dark chocolate after the vanilla extract. The chocolate’s bitterness contrasts the sweet coconut, creating a decadent topper for chocolate cakes or brownies.
Spiced Citrus
Add a dash of orange zest and a pinch of ginger powder. The citrus brightens the flavor, while ginger adds a subtle heat that lifts the overall profile. Ideal for lemon bars or citrus tarts.
Savory Coconut
Replace the maple syrup with a splash of soy sauce and add a pinch of garlic powder. This savory variation works as a topping for grilled chicken or roasted vegetables, turning dessert into a surprising appetizer.
Minty Fresh
Blend in a few fresh mint leaves or a teaspoon of mint extract. The cool mint complements the tropical coconut, making this topping perfect for summer fruit salads.
Storing and Bringing It Back to Life
Fridge Storage
Store the whipped coconut cream in an airtight container in the refrigerator for up to 3 days. Before using, give it a quick whisk to restore any settling. The cooler it stays, the fluffier it remains.
Freezer Friendly
For longer storage, freeze the whipped coconut cream in a freezer‑safe container for up to 2 weeks. When you’re ready to use it, thaw in the refrigerator overnight. A quick whisk will bring back the airy texture.
Best Reheating Method
To revive a frozen or chilled batch, add a tiny splash of water—about a teaspoon per cup—before whisking. The water creates steam that gently heats the cream, restoring its lightness without melting the coconut fat. This trick ensures the topping feels like fresh whipped cream every time.