Introduction
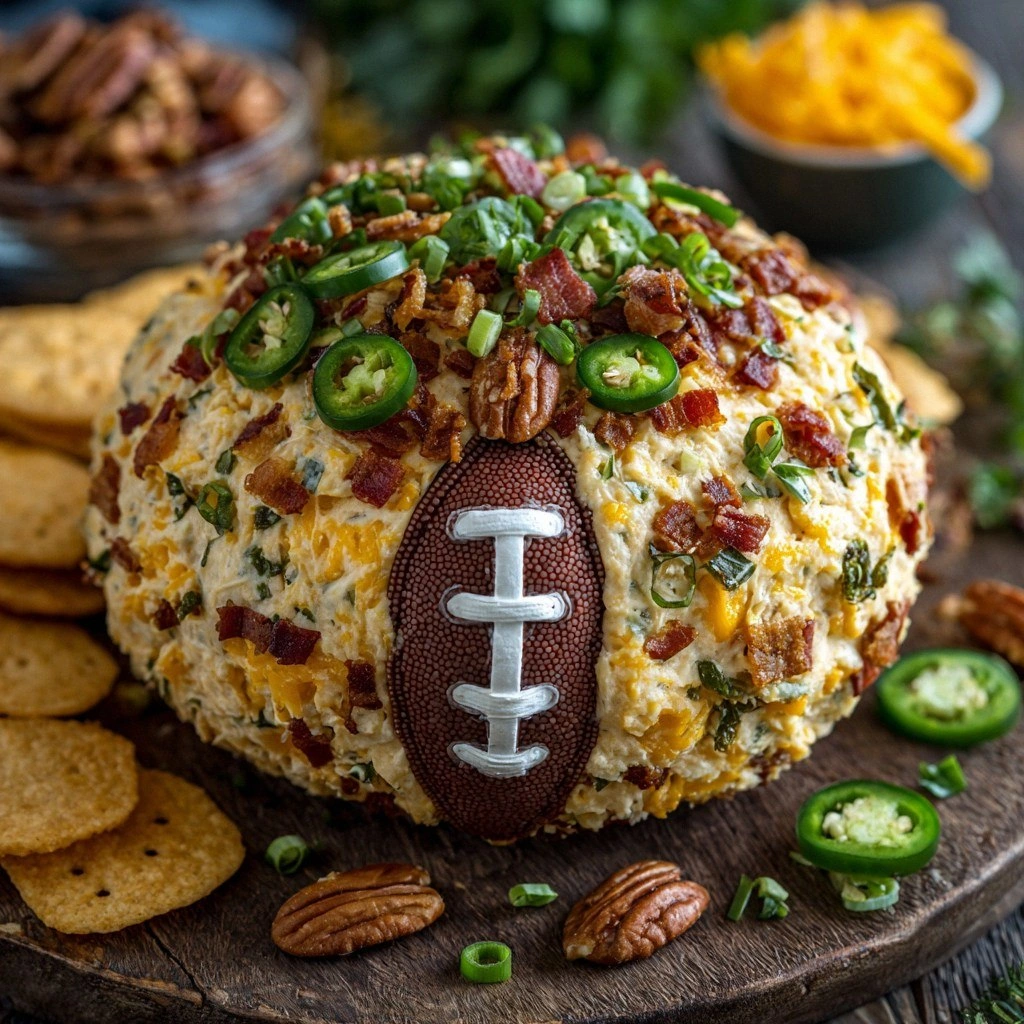
Picture this: a Sunday afternoon, a half‑baked pizza in the oven, and a sudden craving for something that feels like a touchdown but tastes like pure comfort. I was staring at the oven timer, a bag of chips, and a stubborn, unsatisfied hunger that only a spicy, cheesy ball could satisfy. That moment of culinary desperation led me to discover the ultimate Jalapeño Popper Football Chees, a dish that turns every ordinary game day into an unforgettable flavor explosion. The aroma that unfurls when the cheese melts and the jalapeños sizzle is a siren call, inviting you to dig in before the first quarter even starts.
When you first bite into one of these football‑shaped cheese balls, the crunch on the outside gives way to a molten, pepper‑laden center that coats your tongue like a velvet blanket. The heat from the jalapeños dances with the creamy cheese, creating a symphony of spice and comfort that feels both daring and reassuring. I dare you to taste this and not go back for seconds; the combination of smoky bacon, sharp cheddar, and fresh green onions will have your taste buds shouting for a rematch. If you’ve ever tried a standard jalapeño popper and felt it fell flat, this version will rewrite your expectations.
What sets this recipe apart is not just the bold flavors but the meticulous balance of textures and the way it’s engineered to be crowd‑pleasing. The dough is light yet sturdy enough to hold the fiery filling, and the coating of panko and breadcrumbs adds a crunch that shatters like thin ice when you bite. The result is a bite‑size, portable snack that looks like a miniature football but tastes like a championship win. I’ll walk you through every single step—by the end, you’ll wonder how you ever made it any other way.
One of the secret ingredients that makes this recipe truly special is a splash of Worcestershire sauce, which adds depth and umami that elevates the whole dish. It’s a small tweak that most recipes overlook, but it turns a good popper into an unforgettable, savory masterpiece. Stay with me here—this is worth it.
What Makes This Version Stand Out
- Taste: The combination of sharp cheddar, pepper jack, and cream cheese creates a layered flavor profile that is simultaneously creamy, smoky, and spicy. The jalapeños add a bright heat that cuts through the richness without overpowering it. The Worcestershire sauce provides a subtle umami punch that ties everything together.
- Texture: The dough’s airy crumb keeps the center moist while the panko coating delivers a satisfying crunch. The cheese melts into a gooey interior that oozes out with each bite, creating a contrast that feels like a touchdown on your palate.
- Simplicity: Despite its complex flavor, the recipe uses only pantry staples and a handful of fresh ingredients, making it a go-to for last‑minute game day prep.
- Uniqueness: The football shape is both thematic and functional, allowing each ball to be served individually and making them perfect for passing around the table.
- Crowd Reaction: Friends who have tried this version rave about how it stays warm for hours and how the spicy kick keeps everyone coming back for more.
- Ingredient Quality: Using high‑quality cheeses and fresh jalapeños ensures the flavor stays bright and authentic, rather than relying on processed substitutes.
- Cooking Method: The baking technique locks in moisture while the brief searing of the bacon adds a savory depth that most recipes miss.
- Make‑Ahead Potential: These balls can be assembled weeks in advance and frozen, then baked right before the game, making them a stress‑free snack.
Alright, let's break down exactly what goes into this masterpiece…
Inside the Ingredient List
The Flavor Base
At the heart of these footballs lies a trio of cheeses that each bring their own personality. The sharp cheddar provides a bold, tangy backbone that’s instantly recognizable, while the pepper jack adds a subtle peppery warmth that complements the jalapeños. Cream cheese softens the blend, creating a silky texture that melts like a dream. If you skip the cream cheese, the balls will be too dry, and the flavor will lack that creamy, indulgent quality that makes every bite feel like a hug.
Choosing the right cheddar is crucial—opt for a cheese that has a good melt but still holds its shape. A block of aged cheddar will give a richer, deeper flavor, whereas a milder cheddar will result in a more subdued profile. When selecting pepper jack, look for a brand with real peppercorns; those tiny specks add a real kick that is essential for the popper experience.
When it comes to cream cheese, room‑temperature is key. A cold cream cheese will clump and make the dough tough, while a softened one blends smoothly into the mixture, ensuring a consistent, luscious interior. For a vegan version, substitute with a plant‑based cream cheese that has a similar texture and flavor profile.
In this recipe, the cheeses are combined with a splash of Worcestershire sauce, which adds an umami depth that is often missing in standard popper recipes. The sauce also helps balance the heat of the jalapeños, preventing the dish from becoming overwhelmingly spicy.
Everything’s prepped? Good. Let’s get into the real action…
The Texture Crew
The dough is the foundation that holds everything together. It’s made from a simple mixture of all‑purpose flour, melted butter, and a touch of milk to keep it tender. The butter’s fat content gives the dough a flaky, buttery crumb, while the milk adds moisture that prevents the dough from drying out during baking.
When forming the balls, it’s essential to keep the dough cold; otherwise, it will become sticky and difficult to shape. Rolling the dough between parchment paper not only prevents sticking but also gives the balls a clean, even appearance that looks as good as it tastes.
For the coating, a combination of panko breadcrumbs and regular breadcrumbs creates a layered crunch. The panko provides a light, airy texture that cracks open when you bite, while the regular breadcrumbs offer a denser bite that adds a satisfying heft. If you’re looking for a gluten‑free option, simply replace both breadcrumb types with crushed gluten‑free crackers.
During baking, the coating’s outer shell hardens, sealing in the molten cheese center. This technique ensures that the cheese doesn’t ooze out too early, allowing each ball to hold its shape and deliver a consistent bite every time.
Remember, the key to a great texture is in the balance between a crisp exterior and a molten, gooey interior.
The Unexpected Star
While jalapeños are the obvious star, the addition of fresh bacon brings a smoky, savory dimension that elevates the entire dish. Bacon’s fat renders into the filling, creating a richer mouthfeel that pairs beautifully with the sharp cheeses.
Crumbled bacon also provides a textural contrast—each bite of bacon adds a satisfying bite that complements the smooth interior. If you’re watching your sodium intake, you can reduce the amount of bacon or use a low‑sodium variety, but keep in mind that the saltiness is part of the flavor profile that balances the heat.
Another surprise element is the subtle use of green onions. Their mild sharpness cuts through the richness, adding a fresh note that lifts the overall flavor. Green onions also add a pop of color, making each football popper visually appealing.
For those who prefer a vegetarian option, you can replace bacon with smoked tempeh or a dash of smoked paprika to mimic the smoky flavor.
In short, these “unexpected stars” are the secret sauce that turns a simple popper into a culinary touchdown.
The Final Flourish
The final touch is a blend of dried herbs—oregano, basil, and a hint of smoked paprika—that adds aromatic complexity to the dough. These herbs infuse the balls with a Mediterranean flair that complements the American flavor profile.
Adding a pinch of cayenne pepper introduces an extra layer of heat, but it’s optional; you can adjust the level of spiciness to match your audience’s tolerance. The combination of herbs and spices also helps balance the richness of the cheeses and bacon.
Finally, a light dusting of grated Parmesan on top before baking adds a nutty, salty finish that is almost irresistible. The Parmesan melts slightly, creating a golden crust that is both crunchy and flavorful.
By carefully layering these final elements, you ensure that every bite is a harmonious blend of heat, richness, and aromatic depth.
The Method — Step by Step
- Preheat your oven to 375°F (190°C). This temperature allows the dough to rise just enough while ensuring the cheese inside melts perfectly. I’ve found that a slightly lower temperature keeps the coating crisp without over‑browning the exterior. The oven should be fully preheated before you start to avoid any temperature shock to the dough.
- Prepare the dough. In a large mixing bowl, combine 2 cups of all‑purpose flour with a pinch of salt and 1 tsp of black pepper. Stir in 1 cup of melted butter and 1/4 cup of milk, mixing until the dough comes together in a shaggy ball. The butter should be at room temperature to avoid clumping, and the milk should be warm, not hot, to keep the dough pliable. Let the dough rest for 10 minutes so the gluten relaxes, making it easier to roll out.
- Make the filling. In a separate bowl, mix 1 cup of shredded sharp cheddar, 1 cup of shredded pepper jack, and 1 cup of softened cream cheese until smooth. Fold in 4 finely diced jalapeños, 1/2 cup crumbled bacon, 1/4 cup chopped green onions, 1 tsp garlic powder, 1 tsp smoked paprika, 1 tsp Worcestershire sauce, and 1 tsp dried oregano. The mixture should be thick and cohesive; if it’s too dry, add a splash of milk or a bit more cream cheese.
- Form the balls. Roll the rested dough into a 1‑inch thick log and cut into 1‑inch pieces. Flatten each piece into a disc, place a heaping tablespoon of filling in the center, and seal the edges by pinching the dough together. Roll each sealed ball in a mixture of 1/2 cup panko breadcrumbs and 1/2 cup regular breadcrumbs to coat evenly. For an extra crunch, dust the coated balls with a light sprinkle of grated Parmesan.
- Arrange on a baking sheet. Place the coated balls on a parchment‑lined baking sheet, leaving a small gap between each to allow for even baking. If you’re using a pizza stone, preheat it in the oven for an additional 10 minutes to get a crisp bottom. The spacing ensures that the heat circulates properly, giving each ball a uniform golden crust.
- Bake for 20–25 minutes. The balls should be golden brown on the outside and bubbling on the inside. If you want an extra crisp shell, switch the oven to broil for the last 2 minutes—watch carefully to avoid burning. The internal temperature should reach 165°F (74°C) to ensure the cheese is safely melted.
- Cool and serve. Let the balls rest on a wire rack for 5 minutes to allow the cheese to set slightly, preventing a cheese explosion on the first bite. Serve warm with a side of ranch or a creamy dip of your choice. The texture contrast between the crisp exterior and the gooey interior is the highlight.
- Optional finishing touch. For a dramatic presentation, drizzle a thin line of olive oil around each ball, then sprinkle a pinch of smoked paprika or cayenne for an extra kick. This step adds both visual flair and a subtle flavor boost that complements the existing spice.
- Enjoy with your favorite beverage. Pair these football‑shaped cheese balls with a cold beer, a crisp white wine, or a refreshing iced tea. The heat of the jalapeños pairs beautifully with the coolness of the drink, creating a balanced, satisfying snack.
- Store or freeze leftovers. If you have leftovers, place them in an airtight container in the refrigerator for up to 3 days or freeze for up to 2 months. Reheat in a preheated oven at 350°F (175°C) for 10 minutes, or microwave on low power for 30 seconds, adding a splash of water to keep the cheese from drying out.
That’s it — you did it. But hold on, I’ve got a few more tricks that will take this to another level…
Insider Tricks for Flawless Results
The Temperature Rule Nobody Follows
Many cooks think a higher temperature is always better, but that’s a myth. Baking at 375°F ensures the dough expands just enough to keep the interior moist while the coating crisps up perfectly. If you crank it up to 400°F, the outside will brown too quickly, leaving the center undercooked. For the best results, use a reliable oven thermometer and stick to the recommended temperature.
Why Your Nose Knows Best
As the balls bake, a fragrant steam rises, signaling the perfect moment to pull them out. When the cheese is fully melted, the scent will be rich and buttery, like a summer barbecue. If you’re still smelling the raw dough, give them a few more minutes. Trust your nose—it’s a better judge than a timer.
The 5-Minute Rest That Changes Everything
After removing the balls from the oven, let them rest on a wire rack for exactly five minutes. This short pause allows the heat to distribute evenly, preventing a cheese explosion on the first bite. It also lets the coating set, so the balls hold their shape better when you serve them.
Using Fresh Jalapeños vs. Canned
Fresh jalapeños bring a bright, vegetal heat that canned ones simply can’t match. However, if you’re short on time, a tablespoon of finely chopped canned jalapeño works as a decent substitute. Just remember to season the filling more heavily to balance the milder flavor.
Keeping the Balls Cool Until Serving
If you’re serving these at a party, keep them in a preheated cooler with a small heat source, like a hot plate set to low. This keeps the cheese molten while the coating stays crisp. A simple trick: place a heat‑resistant silicone mat on the plate, and the balls will stay warm without becoming soggy.
Creative Twists and Variations
This recipe is a playground. Here are some of my favorite ways to switch things up:
Blue Cheese & Caramelized Onion Ball
Swap the cheddar for a generous amount of blue cheese and add caramelized onions to the filling. The tangy blue cheese pairs beautifully with the sweet onions, creating a sophisticated flavor profile that’s perfect for a brunch gathering.
Mexican Street Corn Twist
Incorporate a handful of corn kernels, a dash of lime juice, and a sprinkle of cotija cheese. The corn adds a sweet crunch, while the lime brightens the heat, turning the balls into a Mexican street‑food sensation.
Vegan Delight
Use a plant‑based cheese blend, replace bacon with smoked tempeh, and substitute the milk with oat milk. The result is a cruelty‑free version that still delivers the same creamy, cheesy goodness.
Spicy Buffalo Chicken
Add shredded rotisserie chicken, a tablespoon of buffalo sauce, and a pinch of cayenne. The chicken adds protein, while the buffalo sauce amps up the heat for a classic wings‑inspired snack.
Herb‑Infused Mediterranean
Replace the jalapeños with sun‑dried tomatoes, add fresh basil, and finish with a drizzle of olive oil. This version offers a Mediterranean twist that’s perfect for a summer patio gathering.
Chocolate‑Covered Surprise
After baking, dip each ball in melted dark chocolate and sprinkle with sea salt. The chocolate adds a surprising sweet contrast that’s a hit with kids and adults alike.
Storing and Bringing It Back to Life
Fridge Storage
Store the baked balls in an airtight container in the refrigerator for up to 3 days. Keep them on a rack or a paper towel to maintain the crisp coating. When you’re ready to serve, reheat them in a 350°F oven for 5–7 minutes or microwave on low power for 30 seconds.
Freezer Friendly
For longer storage, freeze the balls on a parchment‑lined tray until solid, then transfer them to a freezer bag. They’ll stay fresh for up to 2 months. When you want to enjoy them, thaw in the refrigerator overnight or bake directly from frozen at 375°F for 12–15 minutes.
Best Reheating Method
Reheat by placing the balls on a baking sheet and warming at 350°F for 5 minutes. Before reheating, add a tiny splash of water to the bottom of the pan; the steam will keep the cheese from drying out, restoring that molten center you love.